How To Make A Rental Living Room Personal Without Permanent Changes
A practical step-by-step guide to how to make a rental living room personal without permanent changes, including preparation, instructions, common issues, tips, and next steps.
How To Make A Rental Living Room Personal Without Permanent Changes
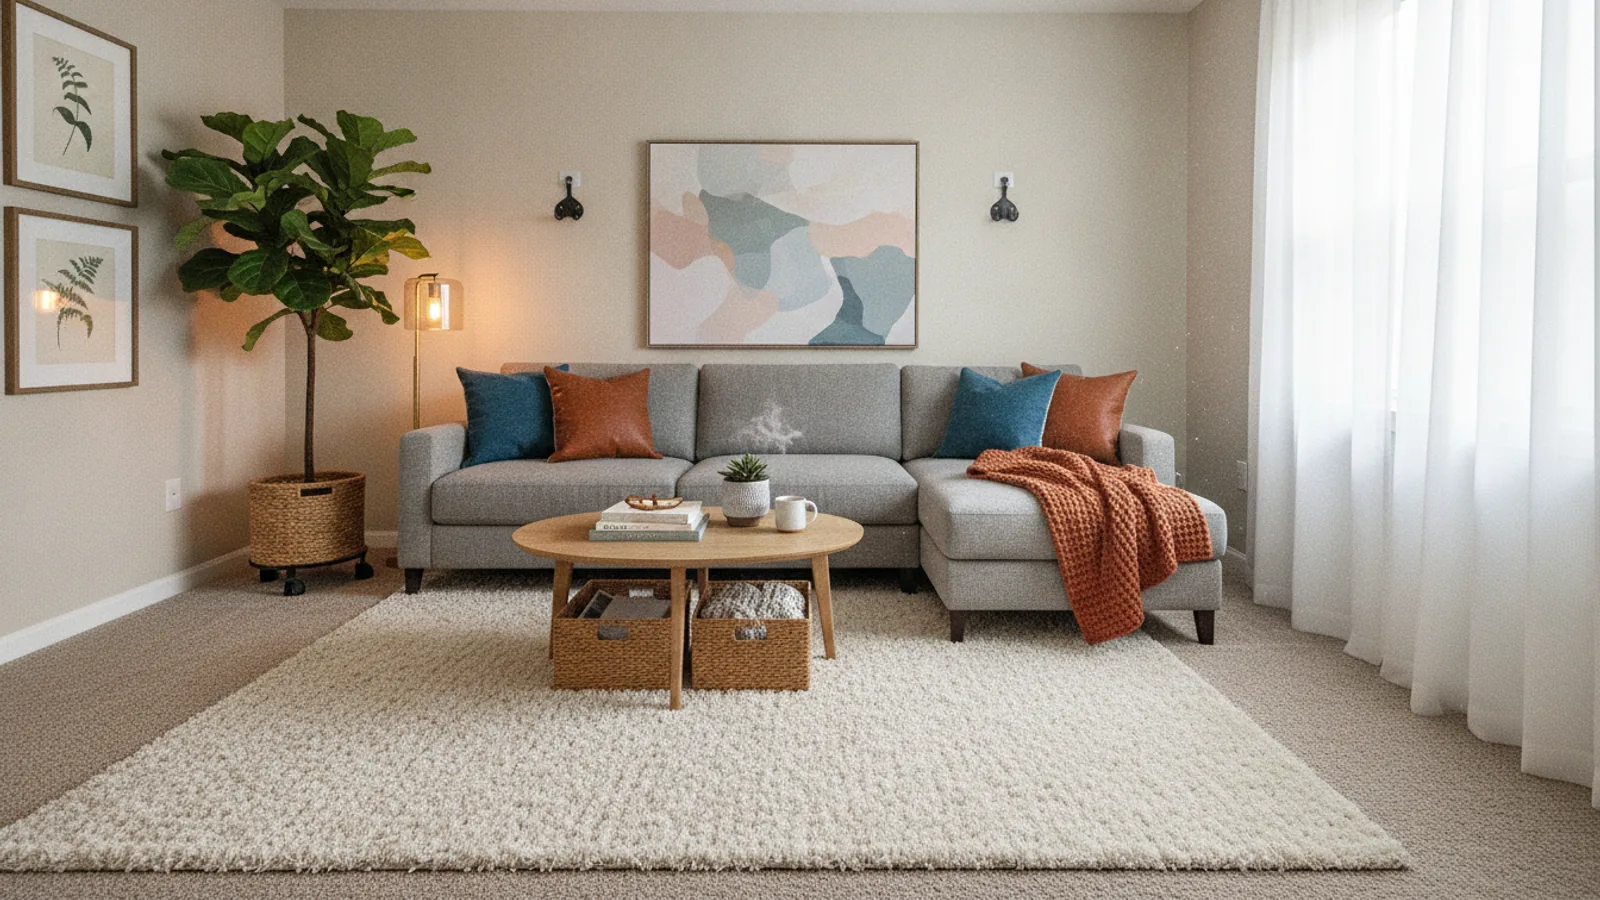
You can give a rental living room a personal, cozy feel without painting, drilling, or making permanent changes. This guide explains a practical order for planning, laying down a removable foundation, layering light and texture, adding wall interest with removable products, styling shelves, and testing every choice so you leave the room exactly as you found it.
Fast Answer
- Start with a clear plan and a damage-free toolkit, then build your room in layers: floor, light, walls, display, and final testing.
- Choose removable products that match your wall type and weight needs, and always test them on a hidden spot before placing anything valuable.
Before You Start
- Measure the room and note fixed features like outlets, vents, radiators, and windows so your plan works with the space instead of fighting it.
- Check your lease or rental agreement for any rules about wall coverings, hanging items, or furniture placement, and ask your landlord if anything is unclear.
- Gather damage-free supplies such as removable adhesive strips, tension rods, freestanding shelves, and cord covers, and read each product's instructions.
- Clear a work area and sort your existing items into keep, store, or donate piles so you can style with intention and avoid clutter.
Step-by-Step Instructions
Plan your personal layout
Before buying or moving anything, sit in the room and decide how you want it to feel. Do you want calm and uncluttered, warm and layered, or bright and social? Write down three words that describe your goal. Then sketch a simple floor plan on paper, marking the door, windows, outlets, and any fixed features like a radiator. Move your main furniture pieces on paper first, keeping walkways clear and placing the sofa or main seating so it faces a focal point you can create. This planning step matters because rentals often have awkward layouts, and moving real furniture repeatedly can scratch floors or scuff walls. Check your sketch against the actual room by standing in each spot and imagining the view. If a piece blocks a vent or outlet, adjust now. A clear plan also stops you from buying items that do not fit or that you cannot install without damage.
Create a removable floor foundation
The floor is the easiest place to add personality because most changes there are temporary. Start by giving the floor a thorough clean, then add a large area rug that covers the main seating zone. A rug defines the space, adds color and softness, and protects the existing floor from furniture marks. Choose a low-pile or flatweave rug if you have heavy traffic, and add a rug pad to stop slipping and reduce wear. If you cannot use a large rug, layer smaller washable rugs in key spots. For extra comfort, place felt pads under furniture legs and use furniture cups on carpet. This order works because a rug anchors everything else and makes the room feel intentional. Check that the rug lies flat and does not block any door swing or create a tripping hazard. A flat rug also makes it easier to place removable wall items later because you already know your main furniture positions.
Layer light without wiring
Rental rooms often have one harsh overhead light, but you can soften and personalize the room with plug-in and battery-powered layers. First, add a floor lamp or table lamp near your main seating to create a warm pool of light at eye level. Use a second small lamp on a side table or shelf for balance. If you want overhead light control, choose a plug-in pendant or a battery-operated clip light that attaches to a shelf or existing fixture without tools. Add a smart plug or a simple inline cord switch so you can turn lamps on and off easily. This order matters because light changes how every color and texture looks, so adjust lighting before you finalize wall decor. Check that all cords run along walls or under rugs safely and do not cross walkways. Also check that lamps use the correct bulb type and wattage for their sockets to avoid overheating.
Add wall interest with removable products
Walls are where rentals feel most temporary, but you can add character with removable options. Choose lightweight art prints, fabric hangings, or removable wallpaper panels that suit your wall type. Before placing anything, clean the wall and let it dry completely, then test a small piece of your chosen adhesive on a hidden spot for the full recommended time. Follow the product's weight limits exactly and use more strips than you think you need for heavier items. Plan your arrangement on the floor first, then mark light pencil dots that you can erase. Press each item firmly for the full time stated in the instructions. This check is important because adhesive needs proper contact and cure time to hold safely and to release cleanly later. Avoid placing items above beds or seating where a fall could cause injury, and keep art away from direct heat or steam. If a wall is textured, painted with flat paint, or in a humid area, choose a different method or skip that wall.
Style shelves and surfaces
Once the room has a floor foundation, light, and some wall interest, bring in your personal items. Use freestanding bookshelves, cube organizers, or floating shelves that lean or stand without wall attachment if your lease restricts drilling. Group items by theme, color, or memory: books, framed photos, small plants, and objects from trips. Follow the rule of three by placing items in odd-numbered groups of varying heights. Leave some empty space so the display feels calm rather than crowded. Add a tray or basket to corral small items and make cleaning easier. This step comes last because shelves should reflect the room's overall color and mood, which you set with the rug and lighting. Check that shelves are stable, that heavy items sit on lower levels, and that nothing blocks vents or walkways. If you use wall-mounted shelves, confirm they are installed correctly and do not exceed the stated weight.
Test, adjust, and plan your exit
Before you live with your changes, do a full safety and damage check. Walk through the room and look for cords that cross paths, rugs that curl, shelves that wobble, and wall items that feel loose. Gently press each removable adhesive item to confirm it is secure, and check that no item blocks a door, window, vent, or heater. Turn on all lamps and check for hot plugs or pinched cords. Then make a simple removal plan: save the original packaging and instructions for every removable product, note where you placed each item, and set a calendar reminder to check adhesives every few months. This check matters because removable does not mean maintenance-free, and small issues caught early prevent bigger damage or safety problems. When you are ready to move out, remove items slowly according to the product instructions, clean surfaces gently, and compare the room to your move-in photos so you can leave it as you found it.
Quick Reference
| Situation | Action | Why it helps |
|---|---|---|
| You want to cover a large blank wall but cannot paint. | Use a lightweight removable fabric hanging or a large removable wallpaper panel, test the adhesive on a hidden spot first, and follow the product's weight and removal instructions. | This adds color and texture without permanent paint, and testing prevents damage to the wall surface when you remove it later. |
| The room has one harsh overhead light and no ceiling fixture you can change. | Add plug-in floor and table lamps at different heights, use warm bulbs, and route cords along walls or under rugs with cord covers or clips. | Layered light makes the room feel warmer and more personal, and safe cord routing prevents tripping and keeps the rental inspection-ready. |
| You need more storage but cannot drill into walls. | Choose freestanding cube organizers, leaning shelves, or stackable bins, and place heavy items on lower levels while keeping walkways and vents clear. | Freestanding storage adds function without holes, and stable loading prevents tipping while keeping the room safe and easy to move out of. |
Common Issues
- Removable adhesive strips fail and art falls.: Remove the item, clean the wall, and check the product's weight limit and cure time. Use more strips for heavier items, press firmly for the full recommended time, and avoid textured or freshly painted walls. If the wall is unsuitable, switch to a freestanding easel or a leaning shelf instead.
- The room still feels like a rental after adding items.: Focus on layers rather than more objects. Add a large rug, two or three light sources at different heights, and one personal display area. Remove clutter and repeat two or three colors throughout the room. This creates a cohesive look that feels intentional without permanent changes.
- Cords from lamps and devices create clutter and tripping hazards.: Run cords along walls, use cord covers or clips, and place a power strip behind furniture. Keep cords out of walkways and away from heat sources. Check that plugs are fully inserted and not pinched. If a cord crosses a doorway, reroute it or use a battery-powered light instead.
Advanced Tips
- Use a tension rod inside a window frame to hang lightweight curtains without drilling, and choose a rod with rubber ends to protect the frame.
- Create a gallery wall on a large piece of paper first, then transfer the layout with removable adhesive hooks to keep spacing even and avoid extra holes.
- Improve sound and warmth by adding a thick rug pad and heavy curtains, which also reduce echo in rooms with hard floors and bare walls.
Final Checklist
- Walk the room and confirm no cords cross walkways, no rugs curl, and no items block doors, windows, vents, or heaters.
- Gently press every removable wall item and shelf to check it is secure, and confirm each one is within its stated weight limit.
- Save all packaging and instructions for removable products, and note where each item is placed so removal is quick and clean.
- Compare the room to your move-in photos and make a simple removal plan so you can return the space to its original condition.
FAQ
Can I make a rental living room personal without losing my deposit?
Yes, if you use removable products correctly. Start with freestanding furniture, rugs, lamps, and removable wall items. Always test adhesive on a hidden spot, follow weight limits and removal instructions, and check your lease or ask your landlord before making changes. Keep the original packaging and instructions, and take photos before and after so you can return the room to its original condition. If a wall is textured, freshly painted, or in a humid area, choose a different method or skip that wall to reduce risk.
What should I check before using removable adhesive on my walls?
First, read your lease or rental agreement and ask your landlord if wall coverings are allowed. Then check your wall type, paint finish, and room humidity. Clean the wall, let it dry, and test a small piece of adhesive on a hidden spot for the full recommended time. Follow the product's weight limit and cure time, and use more strips for heavier items. Avoid textured, flaking, or freshly painted walls. When removing, follow the instructions slowly and gently, and never pull straight out from the wall.
How do I make a rental living room feel cozy on a small budget?
Focus on light, texture, and one personal display. Add a large area rug if you can, or layer smaller washable rugs. Use two or three lamps with warm bulbs at different heights instead of relying on overhead light. Bring in a soft throw, cushions, and a plant or two. Group your personal items on a freestanding shelf and leave empty space so it looks calm. Move furniture to create a clear conversation area, and use a tray or basket to control small clutter. These changes are low-cost, removable, and make a big difference in how the room feels.