How To Arrange Framed Prints Using Paper Templates
A practical step-by-step guide to how to arrange framed prints using paper templates, including preparation, instructions, common issues, tips, and next steps.
How To Arrange Framed Prints Using Paper Templates
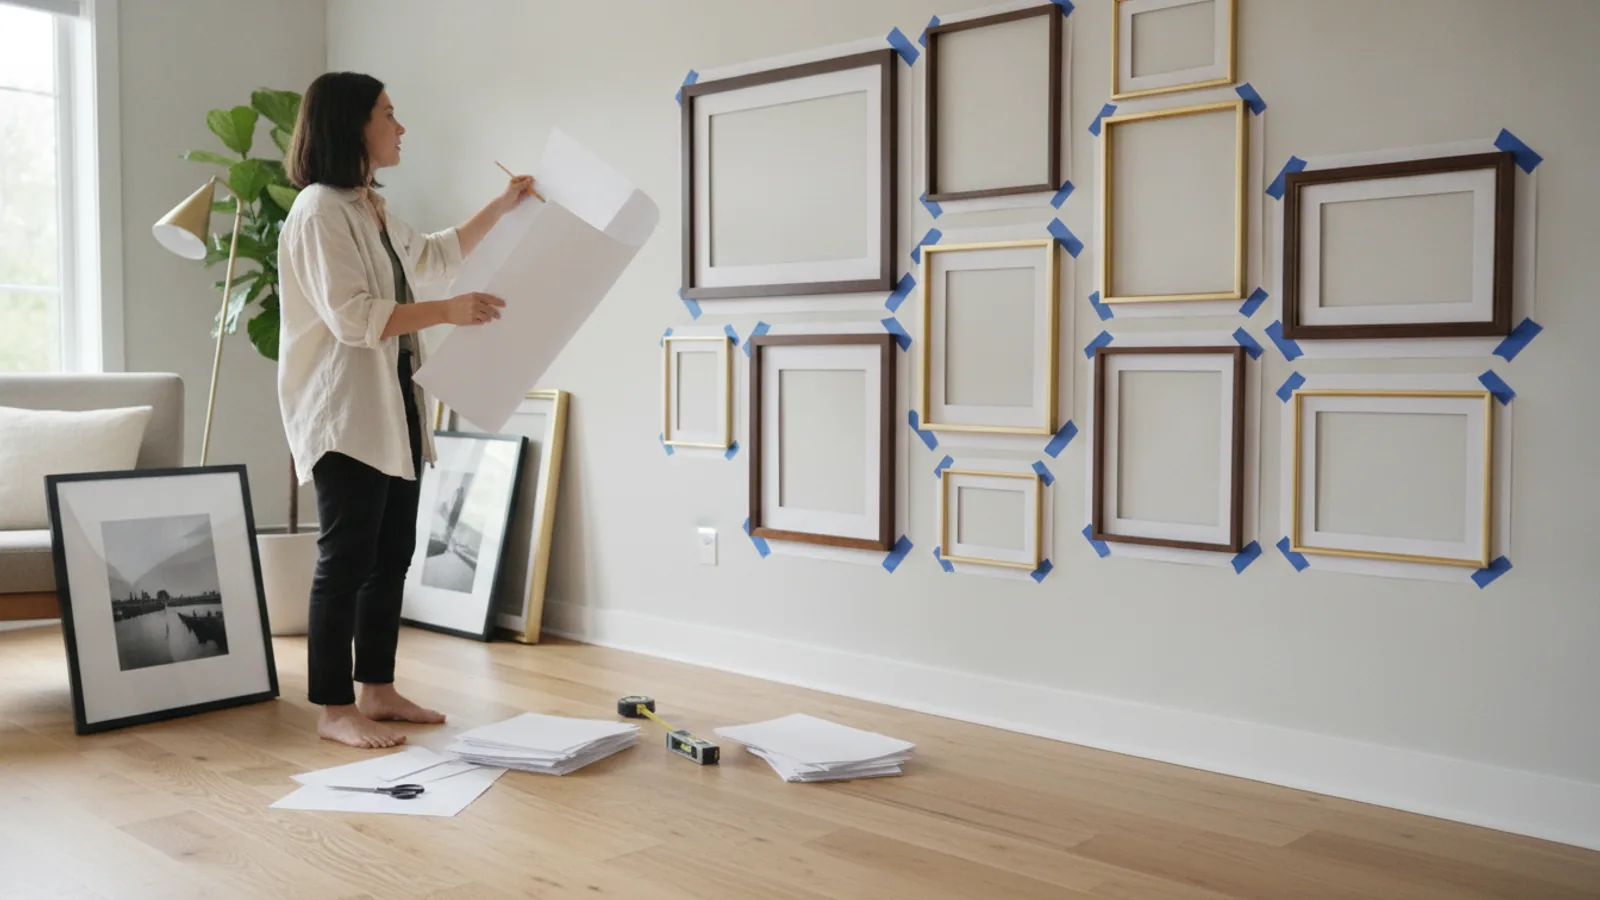
Arranging framed prints with paper templates lets you test a layout on the wall before you commit to nails or adhesive hooks. You cut paper to the exact size of each frame, tape the shapes in place, and step back to judge spacing, height, and balance. The method protects your walls and your artwork, and it makes small adjustments easy and cheap.
Fast Answer
- Cut paper to the exact outer size of each frame, tape the shapes to the wall, and adjust them until the spacing and height feel right before hanging anything.
- Once the paper layout looks good, mark the hook or nail point on each template, remove the paper, install the hardware, and hang the frames on the marks.
Before You Start
- Gather paper large enough for each frame, such as newspaper, craft paper, or packing paper, along with scissors, a pencil, a tape measure, and a spirit level.
- Clear the floor and wall area where you plan to arrange the prints so you can step back several feet without tripping or blocking your view.
- Measure the outer width and height of every frame, including any mat or moulding, and write those numbers down so your paper cutouts match exactly.
- Decide the rough group shape you want, such as a tight grid, a loose gallery cluster, or a single row, and note how the frames should relate to nearby furniture.
Step-by-Step Instructions
Measure each frame precisely
Lay every frame face down on a clean surface and measure the full outer width and height with a tape measure. Include the moulding, any outer mat, and any protruding corner or ornament, because those parts affect how the frame reads on the wall. Write each measurement beside a short label, such as large landscape or small square, so you can match the paper cutout to the right frame later. Repeat each measurement a second time and average the two readings if they differ, which catches a slipped tape or a rounded corner. This check matters because a paper template that is even slightly too small will make your layout look crowded once the real frames are hung, and you will have to start over.
Cut paper templates to size
Use the recorded measurements to draw each rectangle on your paper, then cut just inside the pencil line so the paper matches the frame's outer size rather than being larger. For very large frames, tape two sheets together on the back and mark the join so you remember which side faces the wall. Number each template on the front with a pencil and add an arrow pointing to the top, because an upside-down template will send your layout in the wrong direction. Check each cutout against its frame by laying the paper on the frame face and confirming the edges line up. This check matters because the whole method depends on the paper standing in for the frame, and a wrong-sized template turns every later adjustment into guesswork.
Map the wall and mark a center line
Find the center of the wall area you want to fill and draw a faint vertical line with a pencil on a strip of low-tack tape, not directly on the paint. Measure the height where you want the middle of the arrangement, often near eye level or a fixed distance above a piece of furniture, and mark a light horizontal line the same way. These two lines give you a reference grid for every template you place. If a sofa, console, or bed sits below the wall, measure its width and center it under your vertical line so the arrangement relates to the furniture rather than floating alone. This check matters because a layout centered on the room can look off center over furniture, and the tape lines let you correct that before any hardware goes in.
Tape templates and test the layout
Tape each numbered template to the wall in your planned arrangement, using small loops of tape on the back so the paper sits flat and moves easily. Start with the largest or most important frame near the center line, then place the others around it, keeping gaps between templates consistent unless you deliberately want a loose cluster. Step back at least six to eight feet, and also view the wall from the doorway and from sitting height, because a layout that looks balanced up close can look lopsided from across the room. Slide templates sideways or up and down in small amounts until the spacing reads evenly on all sides. This check matters because paper moves without leaving holes, so this is the cheapest moment to fix awkward gaps and unbalanced edges.
Mark hanging points on the templates
Once the layout looks right, measure the distance from the top edge of each real frame to its hanging hardware, such as a wire peak, a sawtooth hanger, or a keyhole slot. Transfer that distance to the matching paper template and make a small pencil mark at the hanging point, then confirm the horizontal position by centering the hardware on the frame's width. For wire hangers, pull the wire gently upward as it would sit under weight and measure to that point, because a slack wire changes where the hook lands. Press the template back on the wall in its final spot and mark through the paper onto the tape or wall lightly. This check matters because the hanging point, not the frame center, controls where the frame actually sits, and a wrong mark means a visible hole you cannot reuse.
Install hardware and hang the frames
Remove one template at a time, install the hook or nail at the marked point, and hang that frame before moving to the next template, so you never lose track of which mark belongs to which frame. Use a level on the first frame and align later frames to it rather than trusting the paper edges alone. After each frame is up, step back and compare it to the remaining templates, adjusting a mark if the real frame sits differently than the paper suggested. When all frames are hung, remove the tape lines, fill any spare marks that will not be used, and check the overall spacing once more from several viewing angles. This check matters because real frames have depth and shadow that paper lacks, and the final look can shift slightly once the wall is no longer flat and empty.
Quick Reference
| Situation | Action | Why it helps |
|---|---|---|
| The paper layout looks balanced up close but uneven from across the room. | Step back to the far side of the room, view the wall from a seated position, and shift the templates in small increments until the gaps read evenly from those distances. | Distance and viewing height change how the eye reads spacing, so an arrangement that looks correct nearby can appear crowded or drifting from where people actually sit. |
| A frame has a wire hanger and you are unsure where the hook should go. | Pull the wire gently upward as though the frame were hanging, measure from the frame top to that raised point, and transfer the distance to the paper template before marking the wall. | A wire sits lower when slack and higher under weight, so measuring the relaxed position puts the hook in the wrong place and shifts the frame downward. |
| You want to center a group of prints over a piece of furniture. | Measure the furniture width, find its center, and align the vertical reference line for the whole arrangement to that center rather than to the center of the bare wall. | Furniture rarely sits exactly in the middle of a wall, so centering on the wall alone can make the arrangement look offset from the seating or table below it. |
Common Issues
- The paper templates keep curling or falling off the wall.: Use small loops of low-tack tape at the corners and press the paper flat with your hand before releasing it. For heavy or glossy paper, add a third loop in the middle. If a template still droops, switch to a lighter paper or tape it to a thin card backing so it holds its shape while you judge the layout.
- The spacing between frames looks inconsistent after hanging.: Recheck the gaps on the templates with a tape measure rather than by eye, and mark each gap lightly on the tape line. Remember that mats and mouldings create visual width beyond the frame edge, so leave slightly larger gaps between heavily matted pieces. Adjust the remaining marks before installing more hardware, and keep one consistent gap size for a grid or row.
- The hanging point on the paper does not match where the frame actually sits.: Re-measure the distance from the frame top to the hardware with the frame face down and the hardware under tension, then compare it to your paper mark. If the mark is off, patch the old hole, make a new mark on the template, and re-hang. For two-hook frames, measure both sides and level the frame after the first hook is set.
Advanced Tips
- Create a scaled paper plan on a large sheet first, using a simple ratio such as one square for a fixed number of inches, so you can test several arrangements without cutting many templates.
- Tape a long strip of paper along the floor line or furniture top and mark equal intervals on it to keep gaps consistent across a wide row of frames.
- For heavy frames, mark the wall with painter tape and drill through the tape to catch dust, then peel the tape away slowly so the hole edge stays clean.
Final Checklist
- Every paper template matches the true outer width and height of its frame, including mats and mouldings.
- The taped layout has been viewed from close up, from across the room, and from seated height before any hardware is installed.
- Each hanging point is measured from the frame top to the hardware under tension and confirmed on the matching template.
- Spare marks and tape lines are removed, and the finished arrangement is checked once more from several angles.
FAQ
Do I need special paper for this method?
No special paper is required. Newspaper, craft paper, packing paper, or even blank sheets taped together all work as long as the cutout matches the frame's outer size. Thicker paper holds its shape better on the wall, while thin paper curls more easily, so use small loops of low-tack tape and press it flat. What matters most is accurate measurement, not the paper type.
How do I handle frames with wires instead of fixed hangers?
Pull the wire gently upward as it would sit under the frame's weight, then measure from the frame top to that raised point. Mark the same spot on the paper template and center it horizontally on the frame width. After hanging, check with a level and adjust the hook slightly if the frame tilts or sits lower than the paper suggested.
Can I reuse the templates if I rearrange the prints later?
Yes. Label each template with its frame name and keep them flat in a folder along with your written measurements.Now when you move frames to another wall, you can tape the same shapes up, test a new layout quickly, and mark fresh hanging points without measuring every frame again.