How To Balance Mismatched Wood Finishes Across Adjoining Rooms
A practical step-by-step guide to how to balance mismatched wood finishes across adjoining rooms, including preparation, instructions, common issues, tips, and next steps.
How To Balance Mismatched Wood Finishes Across Adjoining Rooms
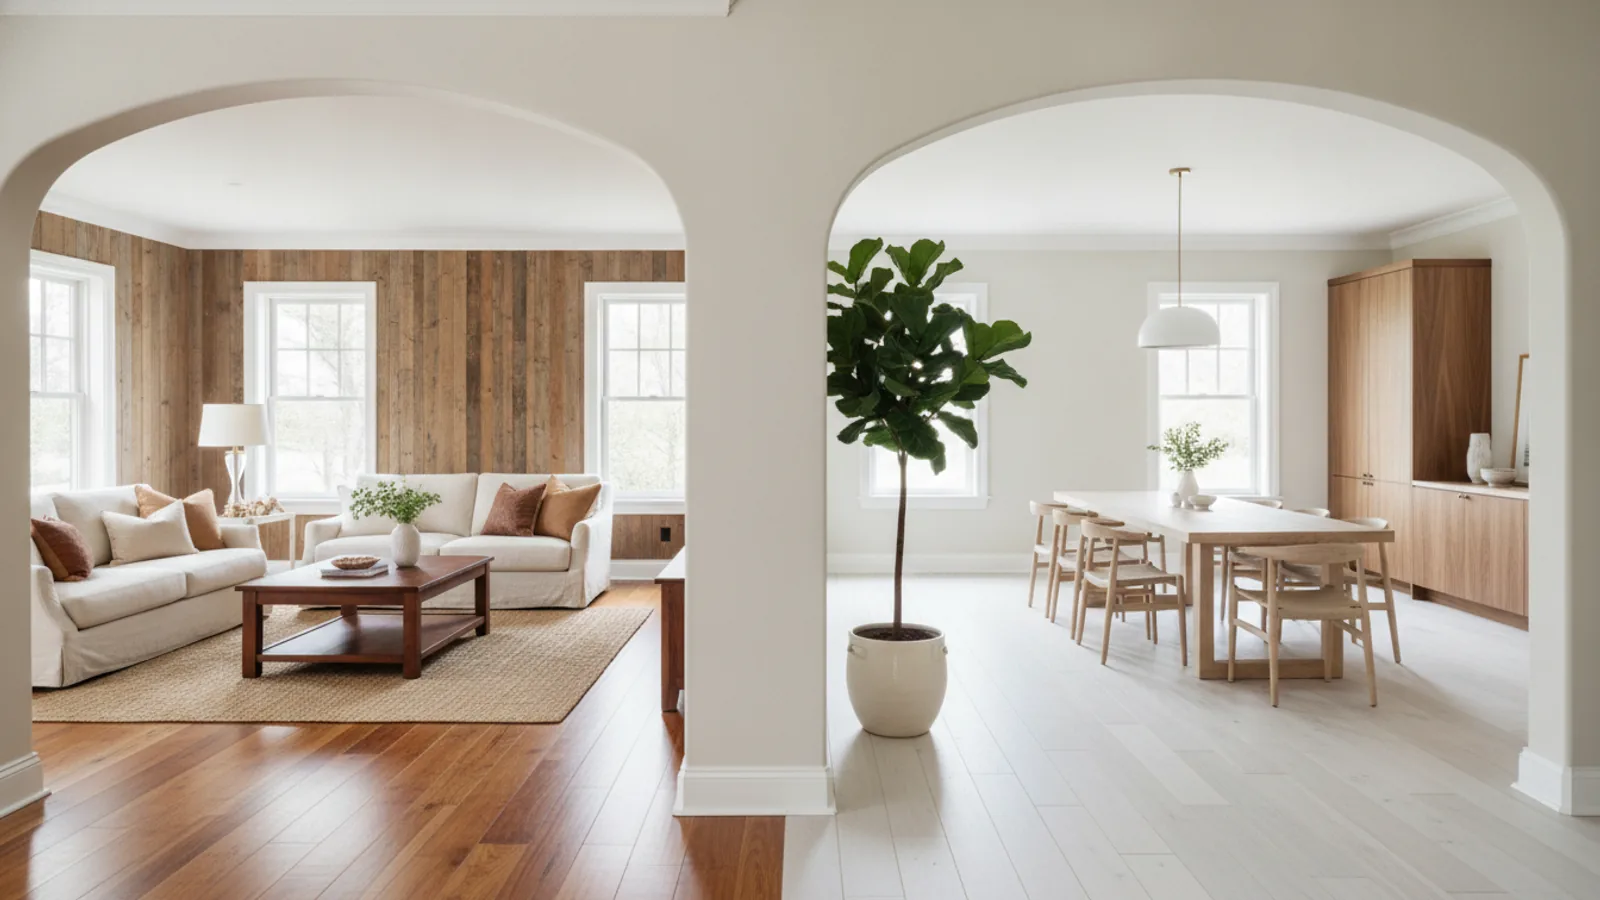
When two adjoining rooms have wood finishes that differ in tone, sheen, or grain, the transition can look jarring instead of intentional. This calm guide walks you through assessment, cleaning, testing, and reversible fixes that blend mismatched floors, trim, and furniture across a doorway. You will learn how to choose a bridging strategy, sample products in your own lighting, and decide when to adjust the lighter surface, the darker one, or the threshold itself. Each step includes a practical check so you can confirm progress before moving on, and the final checklist helps you avoid common mistakes that make the mismatch more obvious.
Fast Answer
- First identify whether the mismatch is mainly color, sheen, grain pattern, or wear, because each cause needs a different fix.
- Then test your chosen blending method on a hidden spot and view it at different times of day before committing to the whole transition.
Before You Start
- Clear the doorway area and pull back rugs or furniture so you can see bare wood on both sides of the threshold in daylight and in evening light.
- Gather a notebook, painter's tape, a soft cloth, a mild wood-safe cleaner, and a few cotton swabs for testing products on small hidden spots.
- Photograph both floors side by side from the same angle, then compare the images on your device to see whether the difference is color, shine, or grain.
- Check the product labels and your home's care instructions for both finishes, because some sealers and cleaners are not compatible with every wood type.
Step-by-Step Instructions
Diagnose the real difference
Begin by deciding what actually makes the two rooms feel mismatched. Stand in the doorway and look at color first, then sheen, then grain. Color is the hue of the wood, sheen is how shiny the surface is, and grain is the visible pattern and direction. Write down which one stands out most. Next, check whether lighting is the main cause by viewing the transition in morning, afternoon, and evening light. A floor that looks red in one room may look orange in another because of window direction and wall color. This diagnosis matters because a color problem and a sheen problem call for different fixes. If you treat a sheen issue with a color product, you may darken the wood without solving the glare. A simple written note and a few photos will keep you from guessing later.
Clean both surfaces evenly
Dust, wax, and old cleaner residue can make two floors look more different than they are. Vacuum or sweep both sides of the threshold, then wipe each floor with a mild wood-safe cleaner and a soft cloth. Work in small sections and change the cloth often so you are lifting dirt rather than spreading it. Pay attention to the doorway strip, where grit collects. Let both surfaces dry completely before you judge color, because damp wood looks darker and can mislead you. This cleaning step is not just cosmetic. Many finishes and blending products need a clean, dry surface to bond or sit evenly, and residue can cause patchy results. After drying, compare the floors again in the same light. If the mismatch is smaller now, you may only need a light refresh rather than a major change. If it looks the same, continue to the next step.
Choose a bridging strategy
Now decide how you will bridge the two finishes. The main options are adjusting the lighter floor, adjusting the darker floor, or adding a transition piece at the threshold. Adjusting the lighter floor usually means adding a subtle toner or stain that brings it closer to the darker room, but this is harder to reverse. Adjusting the darker floor means lightening or refreshing its sheen with a compatible product, which is often gentler. A transition piece, such as a wood strip or a matching threshold, separates the two areas and makes the change feel deliberate rather than accidental. Choose based on reversibility, effort, and how visible the doorway is. Write down your chosen approach and the product you plan to use. This planning check matters because it prevents you from starting a one-way color change and then discovering that a reversible sheen adjustment would have been enough.
Test on a hidden sample
Before you touch the visible floor, create a small test area. Choose a hidden spot such as inside a closet, behind a door, or along a wall under furniture. Tape off a small square and apply your chosen product exactly as directed on the label. Let it dry fully, then compare it to the adjoining floor in daylight and in evening light. Also check how it looks from standing height and from a few steps away, because color differences are easier to judge at a distance. This test matters because products can look different on the sample label than on your actual wood, and lighting changes what you see. If the test looks too dark, too shiny, or uneven, adjust your method or choose a different approach before moving to the visible area. Record what you used and how long it took to dry so you can repeat the result later if needed.
Blend the transition zone
Once your test looks right, work in the transition zone rather than the whole room. The goal is to soften the change at the doorway, not to make both rooms identical. Start at the threshold and feather your product outward, using less as you move away from the doorway. This creates a gradual shift that the eye reads as natural. If you are adjusting sheen, apply thin layers and check between them. If you are adding a transition strip, dry-fit it first, then secure it according to the product directions and your floor type. Work in small sections and keep a damp cloth nearby for mistakes. This gradual approach matters because a hard line of new color at the doorway draws attention to the mismatch, while a soft blend lets each room keep its own character. Stop while the result still looks like wood, not like a painted border.
Check and maintain the blend
After the transition dries, inspect it from several angles and at different times of day. Look for patchiness, missed spots, or a hard line where the new product ends. Run your hand across the surface to check for roughness or tackiness. If something looks wrong, address it before moving furniture back, because it is easier to correct now. Once you are satisfied, replace rugs and furniture carefully to avoid scratching the treated area. For maintenance, use the same cleaner on both sides of the doorway so you do not create a new mismatch over time. Keep a note of the product and method you used in case you need to repeat it. This final check matters because a blend that looks fine at noon can look uneven under evening lamps, and small maintenance habits keep the two rooms visually connected for longer.
Quick Reference
| Situation | Action | Why it helps |
|---|---|---|
| One floor is red-toned and the other is yellow-toned. | Test a thin, compatible toner on a hidden spot of the lighter floor, feathering it toward the doorway rather than coating the whole room. | A slight shift in tone is often enough to bridge warm and cool wood, while a full recolor risks making the floor look artificial. |
| The colors match but one floor looks much shinier. | Apply a thin layer of a compatible sheen-reducing or sheen-adding product to the shinier or duller side, working in small sections and checking between coats. | Sheen differences catch the eye at doorways because light reflects differently from each surface, and matching sheen is usually easier to reverse than changing color. |
| You cannot alter either floor because you rent or the finish is fragile. | Dry-fit a wood transition strip or a low-profile threshold at the doorway, then secure it using a method approved for your floor type and lease terms. | A deliberate transition piece turns a mismatch into a design feature and does not require changing the original wood. |
Common Issues
- The new product looks patchy or streaky after drying.: Lightly sand the test area with a fine abrasive, wipe away dust, and apply a thinner, more even coat. Patchiness often comes from uneven application or a dirty surface, so clean and dry the wood again before retrying.
- The blended area looks too dark in evening light.: View the transition under the lamps you actually use at night. If it is still too dark, reduce the amount of product or switch to a sheerer option, and always retest on a hidden spot before changing the visible area.
- The transition strip feels loose or rocks underfoot.: Remove the strip, clean away old adhesive or debris, and reinstall it according to the product directions for your floor type. A loose strip can trip someone, so check it by pressing firmly along its length before regular use.
Advanced Tips
- Use a color-correcting light or a neutral daylight bulb when judging the blend, because household bulbs can make warm and cool woods look closer than they really are.
- Blend in the direction of the wood grain and stop at a natural break such as a board seam, which hides the edge of your work better than a straight tape line.
- Keep a small labeled sample board of each product you use, stored with the date, so future touch-ups match without guesswork.
Final Checklist
- Confirm the main cause of the mismatch is color, sheen, grain, or wear, and that your chosen fix targets that cause.
- Verify that both floors are clean, dry, and compatible with the product by checking the label and your hidden test spot.
- Inspect the dried transition from standing height and from a few steps away in both daylight and evening light.
- Record the product, method, and date, and recheck the doorway after a week of normal foot traffic and cleaning.
FAQ
Do I have to make both floors the same color?
No. The goal is a comfortable transition, not a perfect match. Many well-designed homes have different wood tones in adjoining rooms, and a soft blend or a transition strip often looks better than forcing an exact match. Focus on reducing the most noticeable difference, whether that is color or sheen, and let each room keep its own character.
How do I know which floor to adjust?
Choose the floor that is easier to test and reverse, and the one that is less visible or less historically important. If one floor has a delicate finish, adjust the other one. If both are similar, a transition piece at the doorway is often the safest first step. Always test on a hidden spot and compare in your own lighting before committing.
What if the mismatch is caused by sunlight fading?
Fading is common and can be uneven. Check whether one room gets much more direct sun, and compare an exposed area with a hidden area of the same floor, such as under a rug. If fading is the cause, a professional refinish may be the only full fix, but a transition piece or a carefully blended toner can soften the difference in the meantime.